If you’ve ever introduced major triads to an elementary piano student, you probably know this scenario:
They play C major. Wonderful!
They play G major. Great!
They play D major…wait a minute. Something doesn’t sound right.
Oops! That’s D minor.
Most students can HEAR when they’ve accidentally played a minor chord instead of a major chord. And once they hear it, they’re usually pretty quick to correct themselves.
But how do we help them memorize all those different chord shapes so they get them right the FIRST time?
When it comes to teaching piano chords, one of my favorite little tricks is something called the Stoplight System!
This simple visual approach helps students recognize, organize, and memorize chord shapes. And the best part? It works for more than just major triads!
I’ll show you how to use it with beginning through intermediate piano students, how it applies to 5-finger scales, and where to grab my FREE printable chord and scale charts to use in your own studio.
What Is the Stoplight System for Piano Chords?
The Stoplight System is wonderfully simple.
Instead of using notes on the staff, letter names, or pictures of piano keys, we use three circles to represent the white-key and black-key patterns of a chord.
For example:
- C, F, and G major: ⚪ ⚪ ⚪
- D, A, and E major: ⚪ ⚫ ⚪
- D-flat and G-flat major: ⚫ ⚪ ⚫
That’s it!
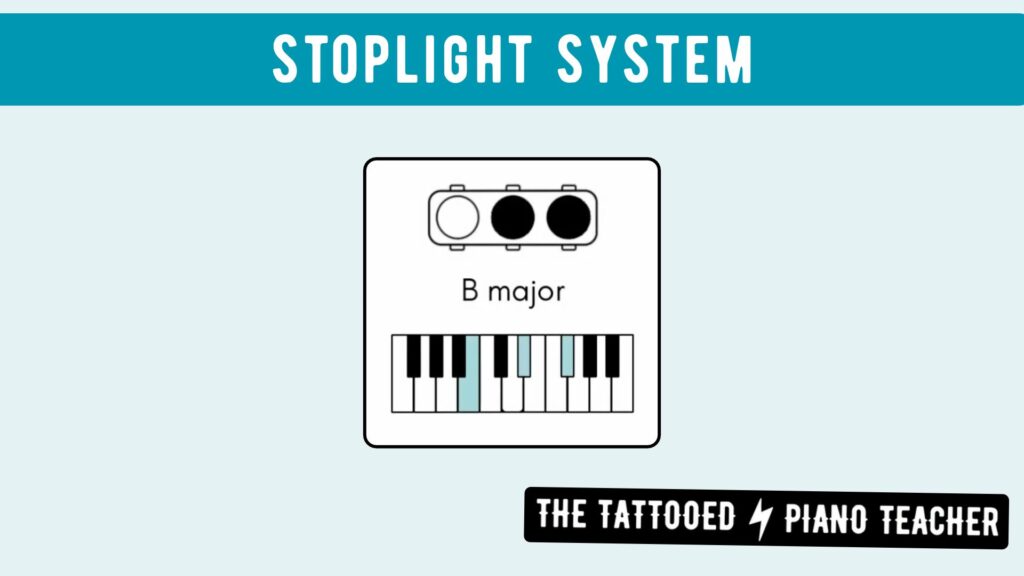
Each circle represents one note of the chord, with white circles for white keys and black circles for black keys.
Notice how several chords share the exact same pattern?
That’s where the magic happens.
Instead of memorizing twelve completely unrelated major triad shapes, students begin recognizing groups of chords that share the same black-key/white-key pattern.
And suddenly, all those major chords become a whole lot less intimidating!
Why Does the Stoplight System Work So Well?
I’ve been teaching piano for over 20 years, and I’ve experimented with LOTS of different ways to help students memorize new concepts.
When I first stumbled across this way of representing chords, I noticed an immediate improvement in how my students understood, grouped, and remembered their chord shapes.
Why? Two reasons.
1. It Creates a Simple Visual
Studies show that our brains retain more information when a visual is introduced. In a 2020 study on visual learning and memorization, students recalled an average of 7.4 words when pictures were included, compared to just 5.6 words without them.
Think about all the information our students are processing when they look at a page of music.
Notes, symbols, words, etc.
Now imagine taking one tricky chord and reducing it to just three circles.
⚪ ⚫ ⚪
No staff. No note names. Not even a picture of the keyboard.
Just three circles!
In my teaching experience, taking a concept off the page and representing it in its simplest possible visual form can make it much easier for students to remember.
It’s something different for their eyes and brains to latch onto.
2. It Groups Chords by Pattern
Our students don’t need to memorize every major chord as a completely separate piece of information.
They can recognize patterns!
For example, once a student realizes that D, A, and E major all have the same white-black-white pattern, those three chords become a group.
When they encounter E major, they can think, “Oh! That’s one of those white-black-white chords!”
This kind of grouping makes a long list of chord shapes feel much more manageable.
Students will retain this even better if they catch these patterns on their own!
In cognitive psychology, this is called chunking, and there’s research to support its effectiveness in piano education! A 2010 study published in the International Journal of Music Education found that beginning college-level piano students who practiced recognizing pitch patterns showed significant improvements in their sight-reading performance.
While the study focused on sight-reading rather than memorizing chord shapes, the underlying principle is similar: recognizing familiar patterns helps students process musical information more efficiently.
Teaching Piano Chords to Beginners with the Stoplight System
So, when should you introduce stoplights?
I like to bring them out when a student is first expected to play several different chord shapes in a short period of time.
For example:
- A new technique exercise that introduces multiple major triads
- A piece that switches between different chord shapes
- A theory unit about major and minor triads
- A warm-up that moves through several different keys or positions
One specific example is the Adventure Warm-Up in the back of the Faber Piano Adventures Level 2A Lesson Book.
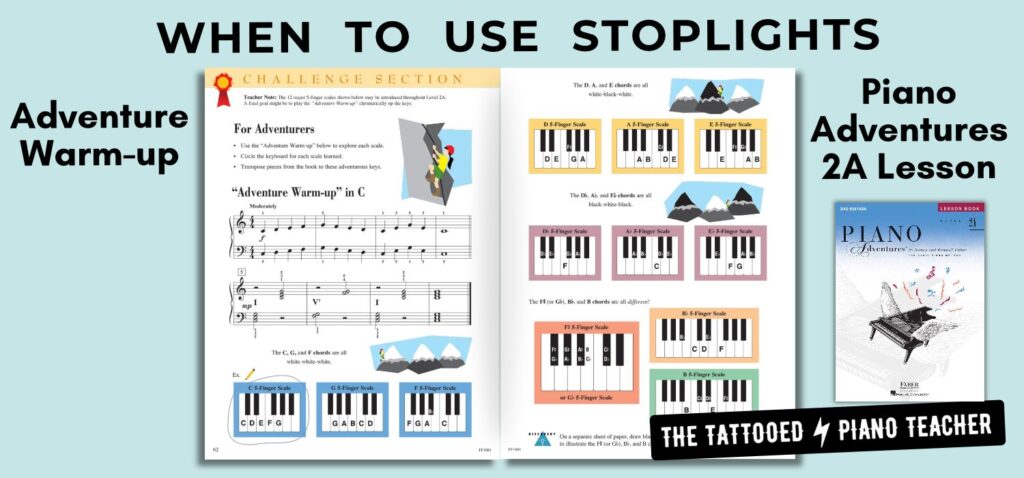
This is the kind of exercise where students might understand how to build a major triad but still struggle to remember exactly where those black keys belong.
And that’s the perfect opportunity for a little visual assistance!
Teaching Tip #1: Draw Stoplights Right on the Music
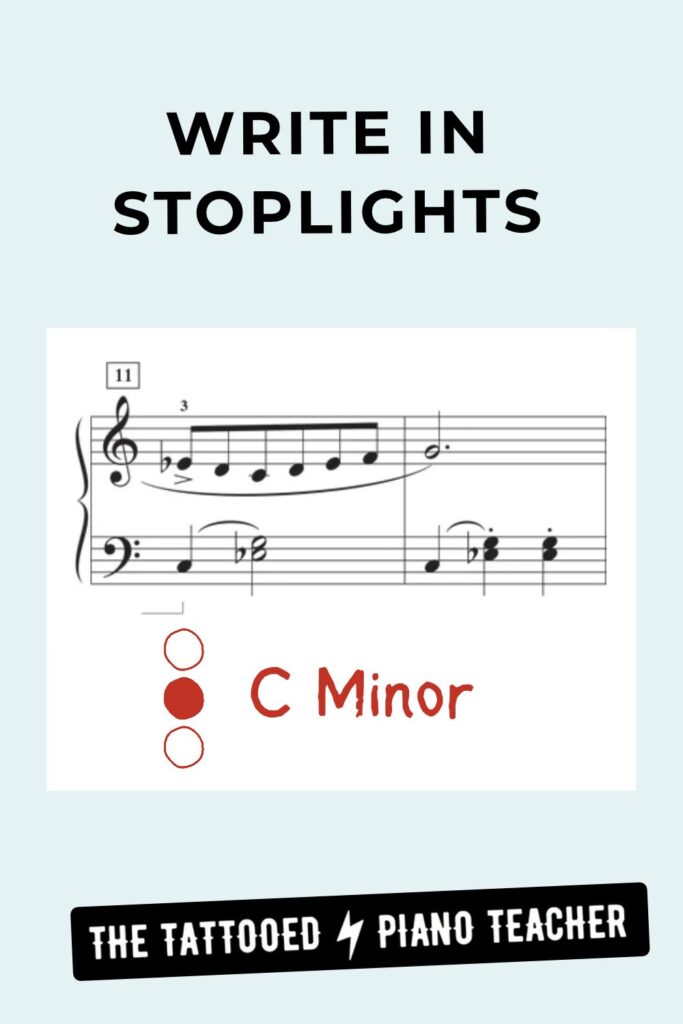
You don’t need any special materials to get started.
Just draw three little circles next to a particularly tricky chord.
Color in the circles that represent black keys, and leave the white-key circles empty.
You can even have the student draw them!
Sometimes I’ll draw the circles horizontally, especially when we’re thinking about how the chord shape physically sits on the keyboard.
Other times I’ll draw them vertically, particularly when I want students to connect the visual with a chord written on the staff, reading from the bottom note to the top note.
Either way, we’re giving the student a little memory trigger.
And here’s something important: The Stoplight System doesn’t give away the answer!
It doesn’t tell students which notes to play or which fingers to use. They still need to understand the chord and find the correct notes.
It simply gives them a visual hint about the pattern they’re looking for.
Teaching Tip #2: Use Printable Stoplight Chord Charts
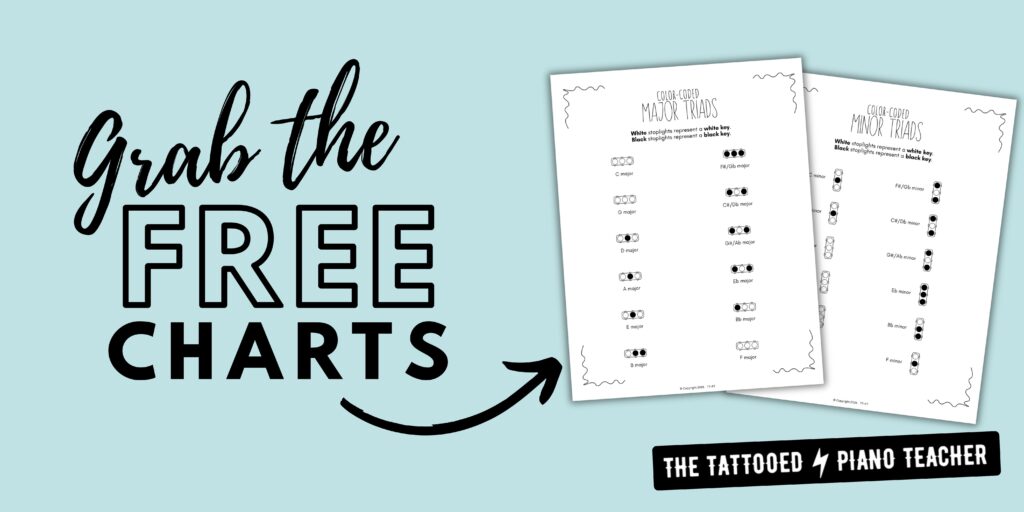
When students are learning a whole series of major or minor triads, I like to use a chart that shows all the patterns together.
This allows them to see which chords share the same shapes and begin organizing them into groups.
I’ve created FREE printable Stoplight Chord Charts for both major and minor triads!
And because I can’t resist making my teaching materials seasonal, I’ve also created versions for different times of the year.
You can use the classic year-round stoplight charts or swap them out for seasonal versions to keep things fresh in your studio.
Using the Stoplight System with Advancing Piano Students
The Stoplight System isn’t just for students learning their first major triads.
As students advance, the chords get more complicated, but the same visual trick can continue to help!
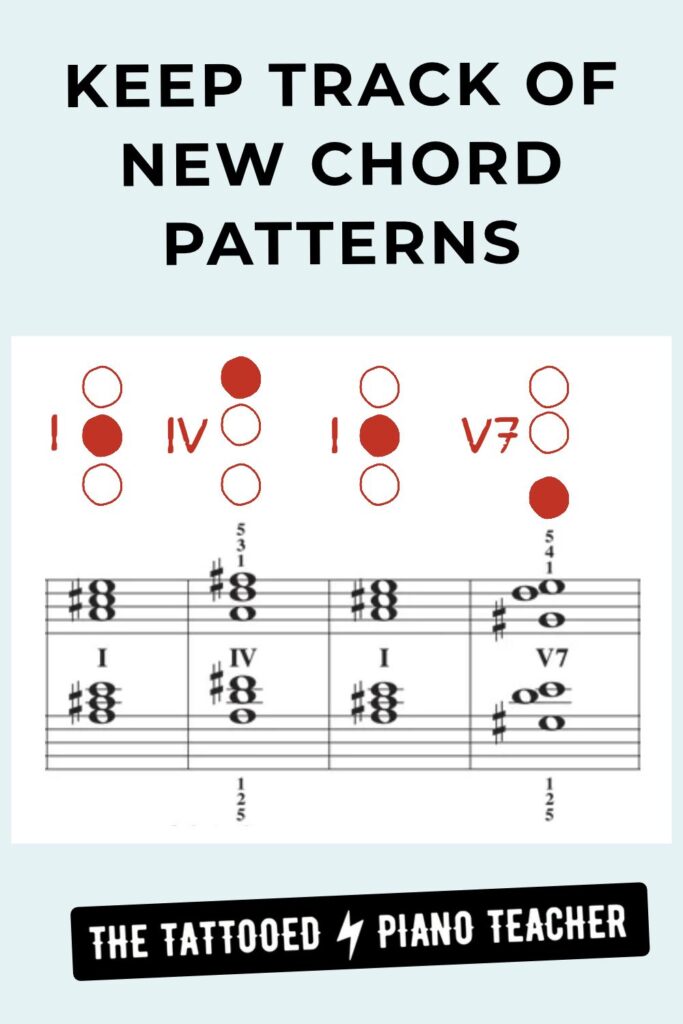
I, IV, and V7 Chord Progressions
When later elementary students begin working with I, IV, and V7 chord progressions in different keys, there are suddenly lots of shapes to remember.
They’re not just playing root-position triads anymore.
Now they’re dealing with inversions, simplified V7 chords, and different black-key patterns as they move into new keys.
For example, even if students get used to I – IV – V7 chords in C, G, and F Major, moving into A Major may be disorienting when they’re asked to hit the F-sharp at the top of the IV chord…they’ll miss it every time for a while!
A few strategically placed stoplights can help students visualize those new shapes without constantly needing to look at the keyboard or have the teacher remind them.
Seventh Chords and Beyond
And what about our early intermediate students?
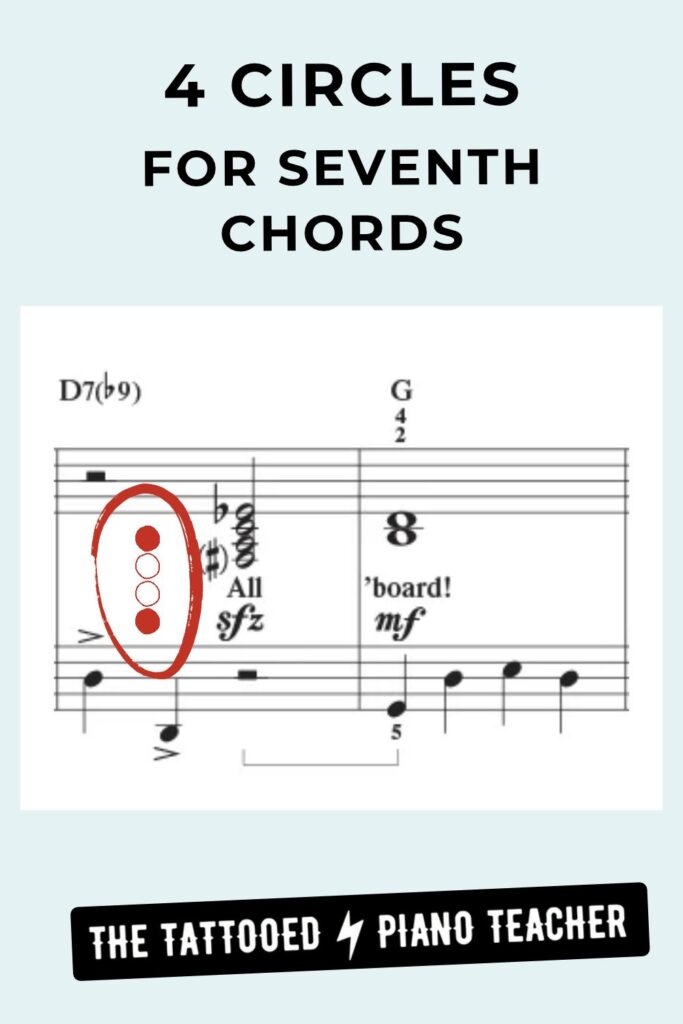
As they begin exploring seventh chords, diminished chords, jazz voicings, and other four-note chords, there’s even more information to organize.
No problem!
Just expand the Stoplight System from three circles to four.
⚪ ⚫ ⚪ ⚫
The concept is exactly the same.
You can draw four circles next to a challenging chord in a piece or use them when introducing a new chord quality.
Again, we’re not replacing the student’s understanding of how chords are built.
We’re simply providing another way to help them remember what they’ve learned.
BONUS: The Stoplight System Works for 5-Finger Scales, Too!
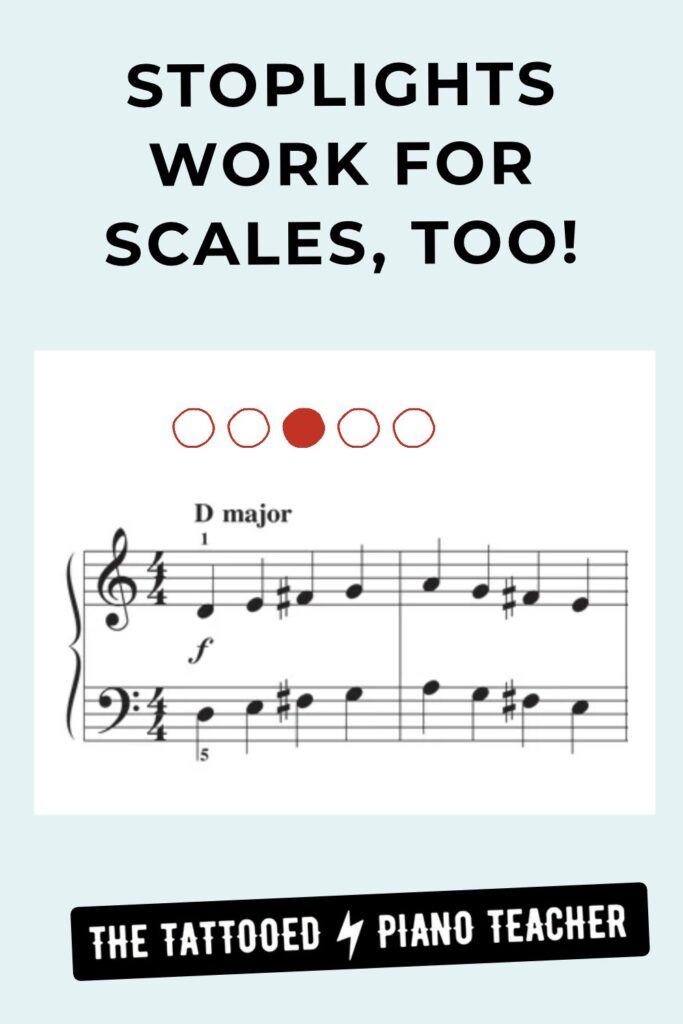
After years of using the Stoplight System with chords, I eventually had a thought:
Hey…why wouldn’t this work for 5-finger scales, too?!
And sure enough, it does!
Instead of three circles, we use five circles to represent the white-key and black-key patterns of each 5-finger scale.
This is especially helpful when students begin learning major and minor 5-finger scales in a variety of keys.
I typically introduce these charts around Faber Piano Adventures Level 2B, when students encounter the big 5-finger scale warm-up in the back of the Lesson Book.
At this point, they’re learning new key signatures and playing scale patterns that might be completely unfamiliar.
Having a simple visual reference can make that process a lot less overwhelming.
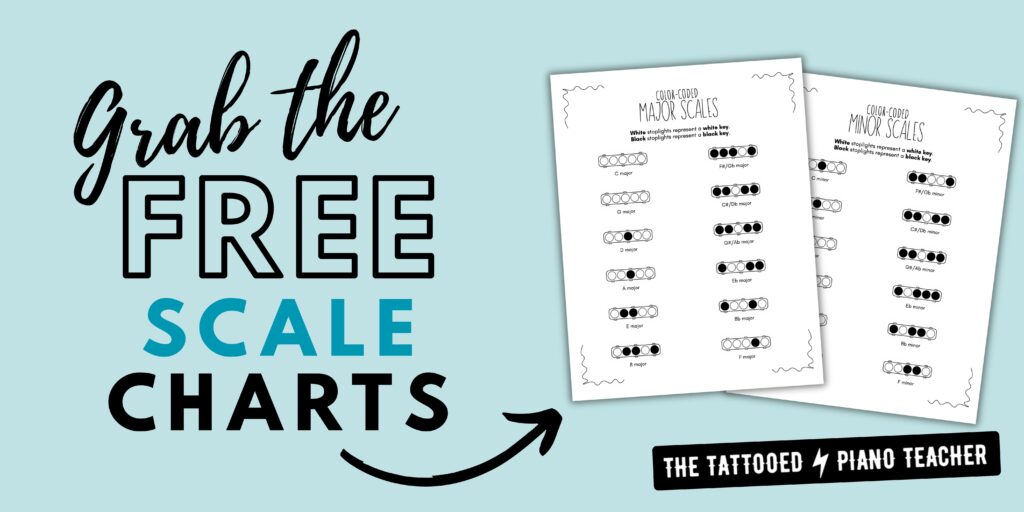
And just like the chord charts, I’ve created FREE printable 5-Finger Scale Stoplight Charts in both year-round and seasonal designs!
Give the Stoplight System a Try!
Sometimes the simplest teaching tricks make the biggest difference.
Three circles might not seem like much, but I’ve found that this little visual can help students make sense of chord patterns that previously felt confusing or difficult to memorize.
And once students start recognizing those patterns, they can apply that same thinking to new chords, new keys, and even scales.
So the next time your student plays D minor when they meant to play D major, try drawing three little circles and see what happens!
Have you tried the Stoplight System with your students? Or do you use another visual trick for teaching chord shapes? I’d love to hear about it in the comments!
Love Teaching Chords?
And if you love getting your students into chords, check out my new method book for older beginners (teens and adults) called Chord First.
Check out the full article here.