
Anyone Can Do This
YOU can build your very own piano teacher website in one afternoon using Wix design tools. There is absolutely no coding involved. Using Wix’s drag-and-drop website builder makes it so easy.
And I’m here to walk you through it! Piano teacher to piano teacher, I’ll fill you in on what pages you need, what text and images you should add, where to put them, and how to put it all together for a simple, beautiful, and effective piano teacher website.
Want to Skip This Step Entirely?
If building your website has you all kinds of stressed out and you have a little money to invest, you might consider hiring out this step.
But if you’re feeling ambitious (or frugal) and you’re still on board with DIY-ing it–let’s proceed.
Before You Start Your Piano Teacher Website
You’ll need a couple of things. Here they are [with links to complete these steps if you need to]:
- Your Business Name
- Your Logo
- At least $23.00 to spend
- A computer
Sign up for Wix

- Next, answer the prompts to describe your business. Enter something like “piano instructor” for the type of website you’d like to create.

Enter Your Piano Teacher Business Information
Enter the name and address of your business. Don’t have a business name yet? I have a post and video to help!
Skip the Working Hours, Services, and Staff prompts. We won’t be using Wix’s on-board booking system so these are not relevant.
Click Continue to Dashboard.
You’ll likely see a pop-up advertising a discount on Wix Premium. Close that for now. The discount isn’t going anywhere!
Claim Your Piano Teacher Website Domain

Enter your desired domain name. This should be your business name (no dashes) with a .com at the end.
Hopefully, you’ll see this message pop up…

(If your domain name isn’t available, check out my Business Name blog post for advice on what to do if your first choice is taken.)
Click Make it yours! You’ll be prompted to upgrade your Wix account.
Sign up for Wix Premium
Upgrading to a Wix paid account will unlock some features you’re really going to want for your piano teacher website. And on top of that, all Wix paid accounts come with a free domain for one year!

Choose Your Wix Premium Plan
Choose the plan that fits your budget. Honestly, the Light, Core or Business plans will all do the trick for now.
My advice is…
- If you need the absolute cheapest option, go with the LIGHT PLAN and choose the monthly option for $23.00. Later on, you can pay the yearly fee and save some money long-term.
- If you can invest over $150, go with the CORE PLAN and choose to pay for a year up-front for $162.
- If you can invest $200, go with the BUSINESS PLAN and choose to pay for a year up-front for $192. You’ll appreciate having all of the storage space, analytics, and search optimization features at your fingertips.
- If you can invest $250, sign up for two years of the CORE PLAN at $264, which will save you more money in the long run, locking in that discount.
- If you can invest $300, sign up for two year of the BUSINESS PLAN at $300, again, locking in a lower rate for a longer period of time.
- And if you can invest over $300, go ahead and lock in the CORE PLAN for three years at $342.
- And if you are financially able to invest $500, save your time and hire me to build your website!
Design Your Piano Teacher Website Homepage
Click Design Site to start customizing your website!
Select Let Wix create a site for you.

Upload a version of your logo you think might look good on the homepage (but you can absolutely change this later).
Enter your information and social media accounts (if you have them).
Pick a theme that you like.

Add pages.
You’ll need three pages:
- an About page
- a Lessons page (or programs or something similar…we can change the name later), and
- a Contact page.

Click Go to editor.

Customize the Homepage Header
The header will appear at the top of every page on your website.
Zoom in to 100% to start making edits.

Customize Your Piano Studio Logo
If you followed my step-by-step guide to creating a piano studio logo, you should be all set and ready to upload! If not, visit this post and video to do that now.
HOW DOES THE DEFAULT LOGO LOOK? If you want to switch to a different version of your logo, click on the logo image and
I recommend making the header only one column (it may default to two or three columns) and centering your logo in the middle.
But many websites keep their logo off to the side, so it’s really up to you!
Play around until your logo is looking just right. Stretch the size of the header section if you want it bigger.
If your logo looks fuzzy at all, go back to Canva and make a larger version of your logo if needed.
Customize the Menu
Click on the menu bar and click Manage Menu. Here you can rename any pages, or hide a page.

Next, click on the menu bar and select the Design button (paintbrush icon).
See another menu theme you like better? Select it here.
Then click Customize Design.
From here you can play around with spacing, colors, fonts, hover actions and more.
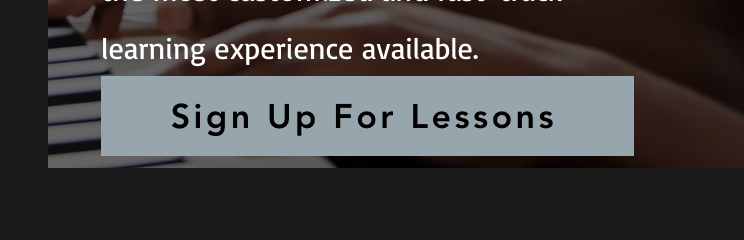
Add a Contact Button
What’s the number one goal for visitors to this page? Most likely you want them to contact you to sign up for lessons! So let’s make it super easy for them to do that.
We’ll make it easy for the customer by adding buttons to the header, the main text of the homepage, and to the footer.
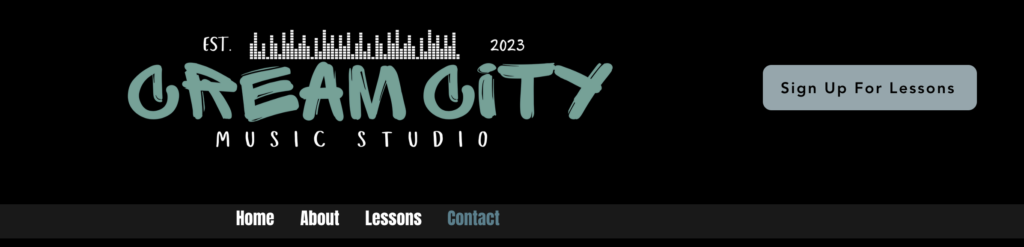
Click Add Element (plus sign in the upper left) and then Button. Pick a button you like the look of. You can customize the text, color and shape later.
Check out the tutorial video for a full walk-through of how you can customize a button.
Move your button where you want it and change the text to Sign Up For Lessons (or whatever you would like). Don’t worry. We’ll link it in a moment!
Final Header Check
Zoom out to 50% to see what your header looks like. Once you’re happy, let’s move on to the footer.
Customize the Homepage Footer

The footer will appear at the bottom of every page on your website.
Zoom in to 100% to edit the footer. Click anywhere on the footer to begin designing.
Change the Text
Remove the “Wix” text from your copyright if you’d like.
Add Social Media Links
Add links to your social media accounts if you have them set up. To do this, click Add Element (plus sign in the upper left) and then Social. Click on each social icon to add your account’s link. Delete any icons for platforms you don’t use.
Add Contact Button
Let’s add a button that will lead to your contact form.
Click Add Element (plus sign in the upper left) and then Button. Pick a button you like the look of. You can customize the text, color and shape later.
Move your button where you want it and change the text to Contact Us (or whatever you would like). Don’t worry. We’ll link it in a moment!
Customize the Main Content of the Homepage
Now for the rest of the homepage. Wix will likely give you several sections as the default. I like to keep things simple.

Delete Unwanted Sections
I recommend deleting all sections except for two that you like the look of:
- One section that is just text or text and one picture.
- One section that is multiple blocks to highlight your different types of lessons, types of customers, or instruments.
TO DELETE A SECTION, right click anywhere in the section and select Delete.
Section 1: A Summary of Your Business
Here we’ll try to include some keywords that customers might be searching for. Keywords you might want to include in this text:
- Piano lessons
- Music lessons
- Piano teacher
- Your state
- Your city
- Your region
- Your suburb
- Your neighborhood
- A nearby metropolitan area
- Kids and/or adults
- Beginners

Write a very succinct summary of your business and put it in bold, big text.
Then expand on that a little bit in a lighter, smaller font paragraph below.
This text can go over an image, above an image or beside an image. Or you don’t need any image in this section.
Don’t have a good picture you can use? Wix has lots of stock photos to choose from! Search for “piano” to see lots of relevant results.
Section 2: A Summary of Your Services
Use one of Wix’s default multi-image sections to create an overview of your services.
Decide Which Services to Highlight
Think like a visiting customer: What would I want a customer to know about lessons if I only had one sentence to explain my business?
Do you teach only piano? Then highlight the different choices of piano lessons, such as:
- 30-minute, 40-minute, and 60-minute
- Beginner, intermediate, advanced
- Little kids, big kids, adults
- Private, partner, group
Do you teach multiple instruments? Then highlight those options in this section, such as:
- Piano, guitar, ukulele
- Private piano, group voice, private voice
- Piano, composition, theory
Whatever your MAIN CATEGORIES OF LESSONS are, that’s what you want to highlight on the homepage.
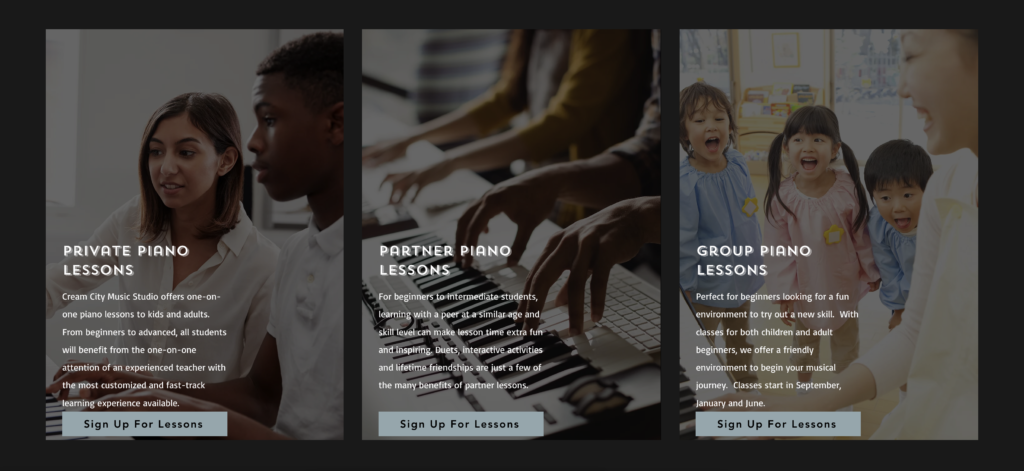
Customize the layout and images
If the default section has four sections, and you only need three (or whatever the case may be), customize the columns by clicking anywhere in the section and selecting Manage Columns.
Click on each column to customize the images. Select Change Column Background. Select Image.
Again, if you don’t have pictures of your own studio yet, use Wix’s stock images to portray each category.

Add your own text
Now add your own text.
Be brief. Customers will be able to visit the Lessons page for prices and further details.
Throw some keywords in there!
Customize to your brand colors and fonts.
Add buttons
Go to Add Element (plus sign upper left) and choose Button.
Give each column its own button enticing potential customers to contact you with one click.
Don’t worry, we’ll link these buttons in a moment.
Zoom out to 50% to see how it all looks! Congratulations on completing your website’s homepage!
Design Your Piano Teacher Website Contact Page
In the upper left corner, selection Page: Contact.
I prefer to delete whatever Wix has added to this default contact page (right click, choose Delete). But if you like what’s there, you can work with it.
With a clean slate, go to Add Element (plus sign upper left) and choose Contact & Forms. Find a layout you like. I used a Registration Form and customized it from there.
Now customize that Form to your liking!
- Change the colors to your brand colors.
- Customize the title of the form to something like: Contact Us to Sign Up For Lessons
- Customize the button text
- Customize the fields
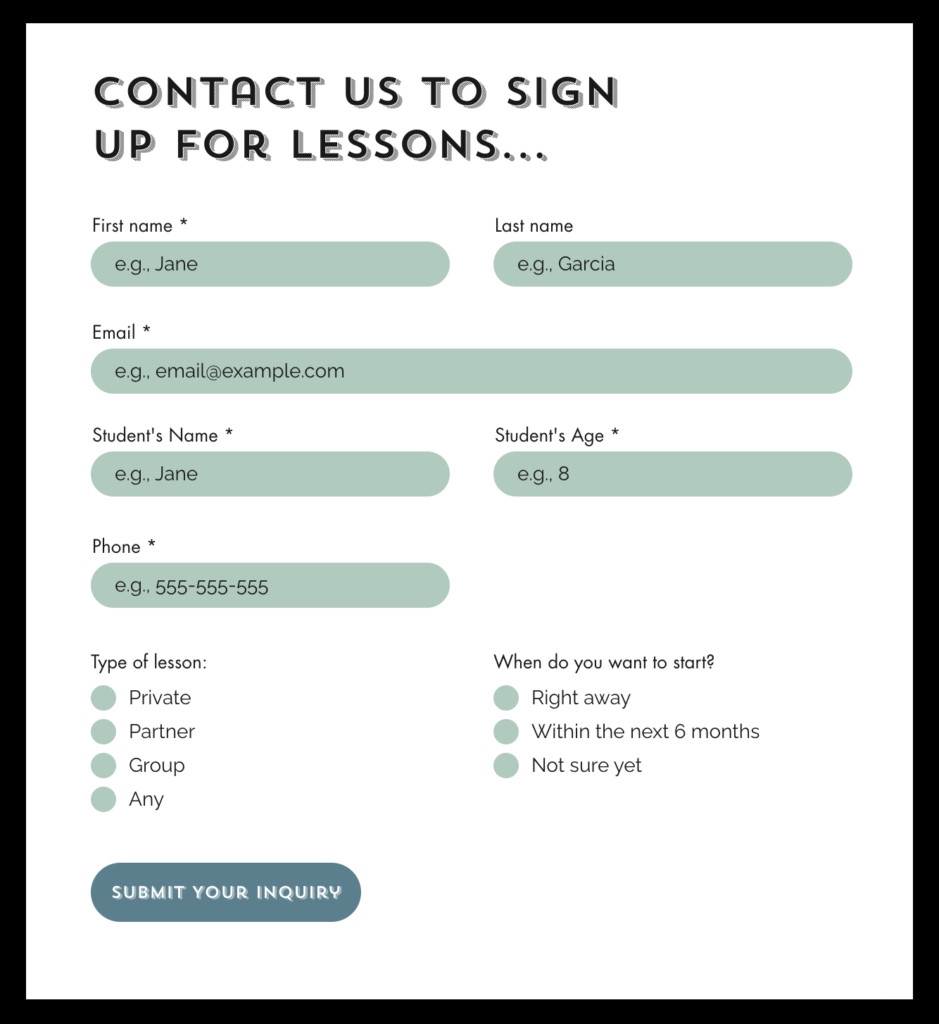
I recommend including these required fields in your contact form:
- Parent First Name
- Parent Last Name
- Phone number
- Student Name
- Student Age
- Type of Lesson (as a multiple choice)
- When they would like to start
Check out this part of the video for a walk-through on exactly where to click and how to customize all of these aspects.
Link Buttons on the Homepage
Link Logo to Homepage

First, let’s make sure visitors will go to the homepage when they click on your logo.
- Go to your homepage by selecting Page: Home from the menu in the upper left corner.
- Make sure you are zoomed in to 100%.
- Click on the logo in your header.
- Select the Link button (chain icon).
- Select Home from the dropdown menu of website pages.
Link Buttons to Contact Page
Next, let’s make sure all buttons actually go somewhere! We’ll link them all to the form you just created on the Contact page.
- Click on the button we added to your header.
- Select the Link button (chain icon).
- Select Contact from the dropdown menu of website pages.
Repeat these steps for all of the other buttons on the page.
Design your Lessons Page
Although I won’t walk you through a step-by-step process on customizing your Lessons page, I’ll give you some overall tips on what to include on this page. The design customization works the same as the homepage.
[Feeling overwhelmed by the design process? If your website is not turning out as you hoped, remember that I do offer website design services. It’s okay to hire help if it saves you time and lessens stress!]
Wix does a pretty good job of giving you some default sections to start out with. Keep the one(s) you like, and delete the rest.
Here’s what I recommend you include on your Lessons page:
- All the types of lessons you offer
- Starting prices
- Age or experience required for each type of lesson
- Images of you teaching (or stock photos for now)
- Answers to any frequently asked questions about lessons
- A BUTTON LINKING TO THE CONTACT PAGE
Design your About Page
Like the Lessons page, I won’t provide a step-by-step guide for customizing this page. Instead, I’ll give an overview of what I would include on this page.
Here’s what I recommend you include on your About page:
- A picture of you
- A quick bio
- A little about your studio
- A picture of your studio
- A BUTTON LINKING TO THE CONTACT PAGE
Preview
Phew! You’ve done a lot of work so far!
Time for the oh-so-rewarding gander at your finished piano teacher website!
Click Preview to scroll through your pages, check all buttons and links, make sure all text is readable and legible, and just admire your hard work.

Publish
Once you’re ready, hit that Publish button!
And, hey, when you publish, email your domain to me at [email protected]. I will gladly be your first visitor!
What’s Next?
I’m sorry to break it to you, but all that effort you just put into your website? Well, it’s all for nothing if nobody can find your website!
Let’s make SURE your website is found by Google by optimizing the SEO of your website. Even if you’ve never heard of SEO, Wix makes it super easy to optimize for Google search.
So come along with me and we’ll get you all optimized! [But maybe take a little break first. Grab a coffee. Maybe a nap. You deserve it.]


2 Responses